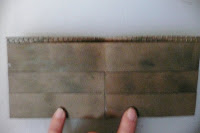
Details:
You will want to use so thick cardstock and it can even be textured. Or, you can emboss it with your cuttlebug.
I used a brown cardstock from Bazzil and cut as follows:
Piece #1 at 9 x 3.25
Piece #2 at 8.5 x 3.25
Piece #3 cut 2 pcs at 4 3/16 x 2"
Piece #4 cut 2 pcs at 4 3/16 x 1"

I ran the big pc through my cuttlebug with the mosaic folder, then inked with chalk ink in brown roan. All pieces were inked in brown roan.
**Piece #1 was scored at 4 7/16 AND 4 9/16. You will have a little tiny book "spine."
**Piece #2 was scored at 4.25.
You can also use a corner rounder on Pc #1 and can use a paper piercer and faux stitching.
To assemble the layers: Open up Pc #1, glue only the 3 sides of Pc #2 (leave the long side of the top open--as if you were putting money in the long side), then Pcs #3, one on each side of the fold and glue only 3 sides, (leaving top open to slide stuff behind). Finally, take both pcs off #4 and repeat (leaving top open to slide stuff behind).
NOTE: There will be a little gap down the middle of the center fold.
Lastly, you can type up anything you want to put inside...take a picture of the kids together (which I will do), make "Coupons" or Certificates or cute business cards. And, put his favorite gift card in it.
I cannot take credit for this design, there are many tutorial videos out, can't remember where I saw these directions now.


This is a REALLY cool project! How fun and interactive it is :)
ReplyDeleteAwesome Donya. I love it. Turned our great. :)
ReplyDelete