Showing posts with label Glossy Accents. Show all posts

March 21, 2011

Happy Monday

Hello everyone! Hope you had a good weekend. Wanted to share the birthday card my daughter and I did for my niece who is turning 12. We just mailed it off today. This is the card from her. :)

My daughter had the idea in her head and told me what she wanted so I helped her on my gypsy follow through with what was in her head. She picked out the papers and said these colors would be a "girls dream colors for an I-pod." LOL

Carts Used: Paisley (MP3 player), gypsy wandering, card layers, Nates ABC's for font
Sizes: Card Base 5.5x5.5, Card Layers--MPS 4", Font inside card 1.05 and shadow 1.15
Details: All paper is Creative Memories. Found a square card base (The black paper, I think we used LAB) and used hide/contour for the design on that and sized to 5.5x5.5.
The Plum cardstock was a square we cut at 5.25x5.25. The purple swirly paper was cut at 5x5 using a design in GW. I used a blade depth of 2, pressure high and speed high to cut since a thinner paper.

For the MPS player, we couldn't hide/contour on the gypsy all the parts we wanted to to recut it. So, we just cut everything in several different colors--grey, pink, black and purple and decided after that how she wanted her "Dream Ipod" to look. The music notes were also from Paisley and we cut at 2, 2.5 and then used MS Hematite glitter. We ran the notes through the Xyron "X" and then applied glitter and then the glossy accents. Also, used a white sakura pen and a ruler to add faux stitching.

The white scalloped trim was this cool pearlized thick cardstock I had. I used Lacy Labels to cut a scalloped 5x5 shape and then didn't want to use it. My daughter suggested to trim off the edges and glue to the back side of the plum paper. Pretty creative girl huh? LOL

Inside the card, the plum cardstock square was 5.25x5.25 and the purple swirly square was cut at 5x5. We welded the Nates letters together for both the lavender and the shadow in the purple. Again, used a white sakura pen and ruler to add faux white stitching. W.e used some lavender jewels and silver sticker stars from the $1 bin at M's


March 17, 2011

Happy St. Patricks Day

Here is one last St Pats Day card for 2011. It is an A7 card

Cart: Shamrock PDDU at 2.75 and 3 inch
Supplies: green organza ribbon, cuttlebug and D'Vine embossing folder, glossy accents, MS glitter, various scrapbooking paper, black Staz-On ink pad.


February 14, 2011

Happy Valentine's Day! I thought we'd be going out to dinner tonight. It seems my husband over the weekend was having molar pain and sure enough, today found out has to have a root canal. Couldn't have it today since to swollen. So, we'll be taking a rain check on that and eating something nice, romantic and mushy tonight :O LOL He did come home with some roses so that always works....right?

Since I'm homeroom Mom, I'll be going up to my DD school in a bit with my wild man for her Valentine's Party.

Here is a card I did to give to my In-laws yesterday. It is a 5x7 card, I used pink BoBunny paper, and Martha 4x6 paperpad (one paper says "love" and the other has hearts.)

The shoes are from the Sweethearts cart and I think I cut them at 2.75 with expression and gypsy. I did 3 layers on the heart on the shoe, glued together and then ran through the Xyron , did MS red glitter and glossy accents. {I LOVE glossy accents!!} Then gently glued on the high heel when dry. I outlined the man's shoe with a fine point CM brown pen and then did brown ink around the edges. The pink show was edged with pink ink, as were all edges of the papers. The inside message of the card was done at 3.


Hope you all enjoy the day!!
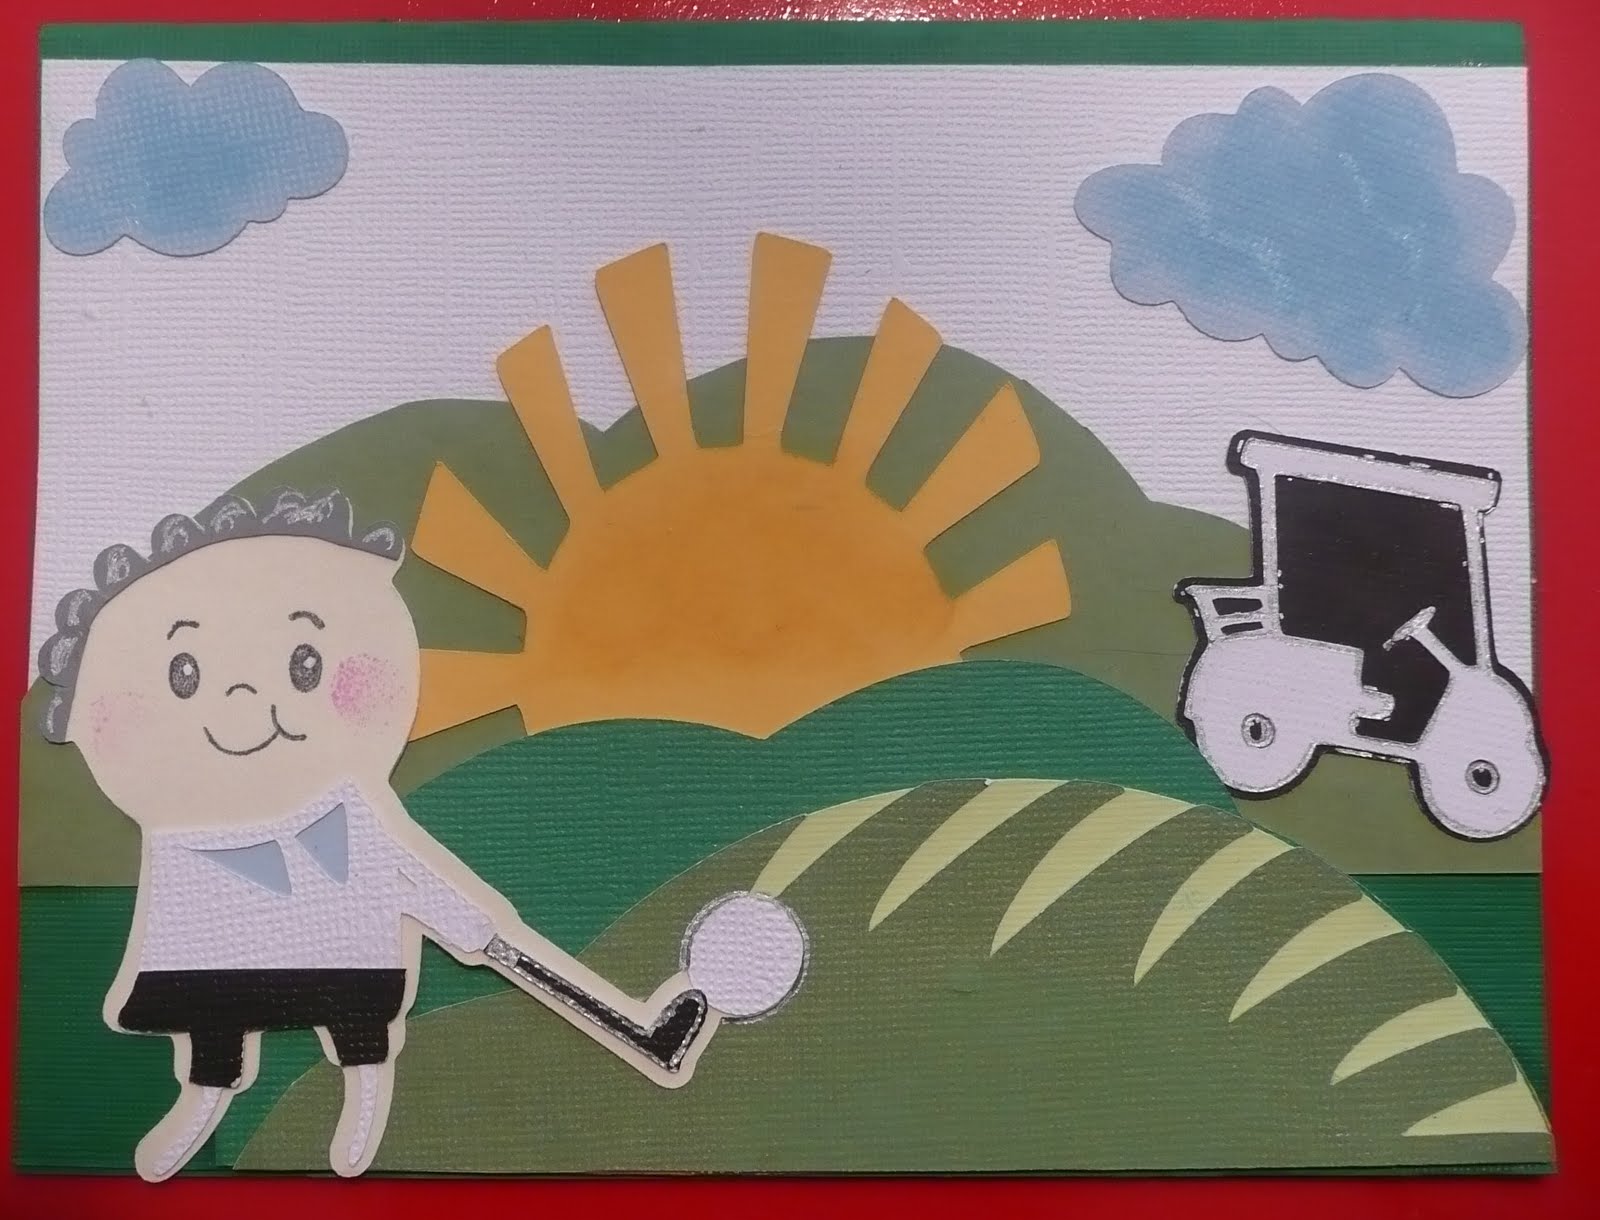
Oh, almost forgot....if you looked below you saw the golfer I did with car accents. We were going to make it into a Bday card for my FIL. Well, my DD took it upon herself to do the below card all by herself. I was quite proud of her!! :) :) She used country life for the sun/grass. I showed her how to take the read dial size off on the gypsy (the chain link) and size the grass exactly to 6 wide and 4 high. Then we just cut an extra layer again for the darker green behind the sun. The golfer was car decals (see rest of details below) at 2.75 and the golf cart was at 2". Clouds were EDPD and then chalked.


February 10, 2011

Valentines day card #2

Wow! Day 2 of posts! LOL
We got another 4 inches on Wednesday and STILL are snowed in (I haven't driven a car since Monday Jan 31st...can ya say I'm stir crazy!) because hubbie has to drive my SUV with 4 wheel drive to work.

So, here is another card. DD had this idea to give to her teacher because her teacher has a cat and dog. So....

I got car decals 2 weeks ago. I love Paper Pups with the simple layering and that is the main reason I got car decals. Very similar. I never wanted to use it for "car decals."
This is just me but the only thing I don't like about car decals is one eyeball is always smaller than the other. I know it's suppose to be that way. I just use the gypsy to hide/contour and will either draw on my own or use black flat accents for the eyes. I might try to use PK stamps too maybe...hmmmm....

So this was a store pre-made tan 4x6 card. I used car decals and cut the dog and cat at 2.5." The heart is from sweethearts and I think 1". The paper is Martha Stewart key and heart mat pad, and the heart punch is Martha. The twin is red/white from someone on ebay.

I don't remember the sizes I cut the mats. I ran the heart shape through the Xyron X and then used MS red glitter. Then, used glossy accents for the first time. I can tell I will be a BIG fan of glossy accents! I put the dog and cat together, glued down their eyes, drew on a black nose. I wanted the dog and cat facing a certain way so they could look like they were holding the heart so I turned and flipped one of them before cutting.

Glued down the red heart mat, then took twine and wrapped and taped to the tan printed mat and tied a bow. Then glued down on the red mat. Glued down the punched heart border and finally the dog and cat. After glossy accents dry (I put on thin so like 15 min) I glued it on top of their paws.

Inside the card was an EK success punch for the tag. Used a stamp from M's and some black stampin'up ink. Then glued down another MS heart border


Related Posts Plugin for WordPress, Blogger...