Showing posts with label Cricut WIMG. Show all posts

April 4, 2011

Challenge: Cricut Cardz #68

Hello! I entered the below card for the Cricut Cardz Challenge #68, that ends Tues 5th. The challenge was to create a card using any cart for a house, use a touch of lace and a flourish and to use any colors you like.

Details: 5x7 premade white card base from H/L. Bo Bunny Powder Blue back to back paper for the sky. Green sticker paper for grass from CM. Green lace for grass from H/L. All other papers are either Bazzil or from H/L.

Carts: Kates ABC's for house, Paper Pups for clouds, (using hide/contour on gypsy to cut 2x, in white, then in blue) Simply Charmed for the sun, Give a Hoot for the tree, fence from Heritage, flower tops from Walk in My Garden, Grass ?? cart (used grass for the flower petals) red bird I think was one I had laying around and cut from Winter Frolic.

For the house from Kate's, I "hid" the round window and instead cut a flourish above the door from Gypsy Wanderings. (I think, now I'm not sure LOL)

House--Kate's Lace-- used for the grass Flourish--above the door from GW


March 28, 2011

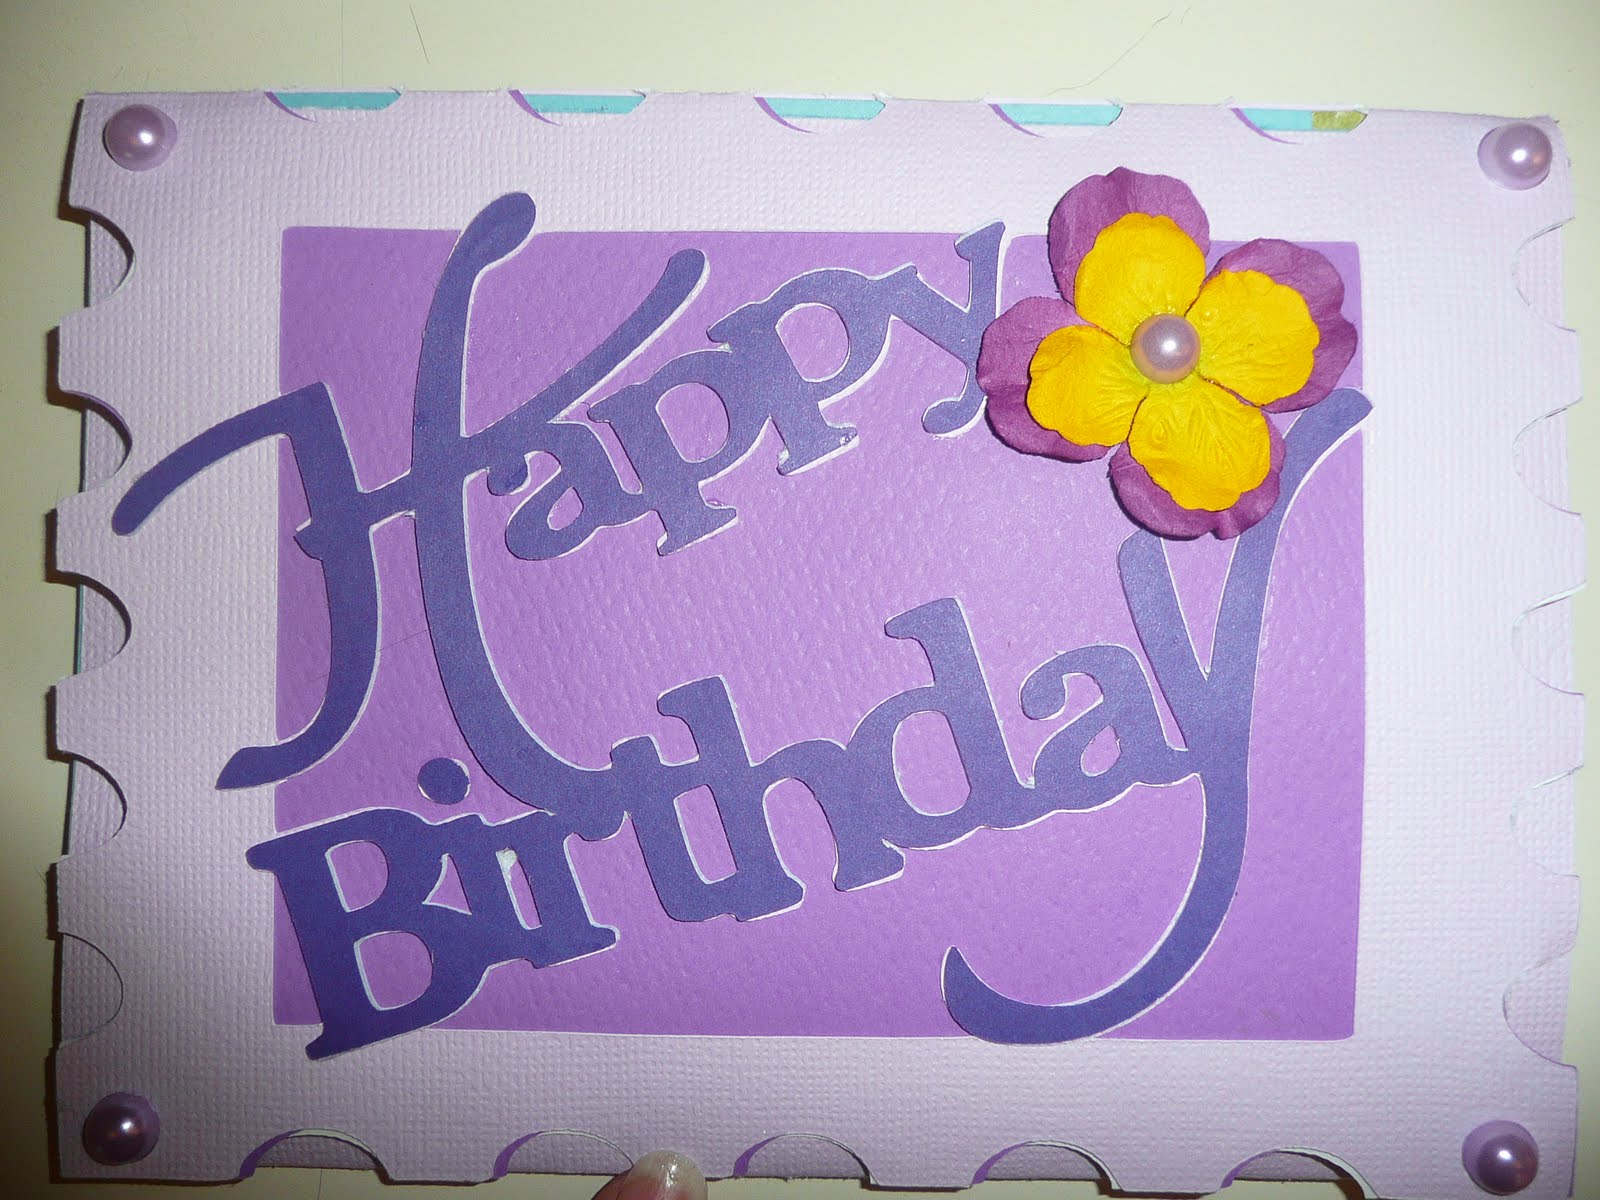
Birthday Card

Hello everyone. Good Gravy! I cannot believe in less than a week I went from 42 followers to 74--WOWSERS!! Thank you so much everyone and I hope I can live up to everyones creative expectations :)

I mentioned in previous posts I had a lot of birthdays in March. Last week you saw the picture frame card I did from my 3 yr old son for my MIL's birthday. I was bad and didn't do one from my hubbie and I.

But my 9 yr old wanted to do one. She knows my MIL likes birds and the color purple. So, she picked out the papers and went through a few of the cricut books and tol me what she wanted for a picture.

Then, she tells me she wants a "long fold up card!" I have never ventured out of my box to do anything like that. So I got my gypsy and my favorite card card--Gypsy Wanderings and started trying to figure it out. LOL ~~~~~~~~~~~~~~~~~~~~~~~~~~~~~~~~~~~~~~~~~~~~~~~~~~~~~~~

Go take a look at Sheila at She's a Sassy Lady's video and this is what started our inspiration for a window card with a phrase inside. I'm sure there were easier and quicker ways to do it but it took me a bit to get the words "Happy Birthday" positioned just right inside the frame. And, even though the words WERE already welded together in Gypsy Wandering, I STILL had to "weld the welded phrase" to the frame so it would cut the way I wanted. That meant resizing and resizing and nudging and stretching. Hopefully all this makes since by seeing a little visual.

So, first I did the postage stamp frame from the GW cart at 5x7. Then I took another rectangle frame cut from GW at 5x7 and used hide/contour for the inside frame part so it wouldn't cut as a frame. Then I duplicated that. Then, I nudged all of those shapes together, grouped and welded. After that, I worked on my Happy Birthday phrase to weld as much of the wording edges as possible to the inside frame. Then, I grouped/welded the phrase to the postage stamp frame. All was cut in one shot in lavender paper.

After that, I copied the phrase and pasted to a blank layer so I could cut that in darker purple (and to give some thickness to the wording. I did that 2x) and there are 3 layers to the phrase "Happy Birthday." The blue for the sky was cut as 2 welded 5x7 cuts (the postage stamp card cut was unwelded)


Carts Used & Size:

*Gypsy Wandering (Card Base with frame, the words Happy Birthday (5.62 x 9.39), all extra card mats in the various colors) All card bases at 5x7.

*50 States--for the Robin--cut at 1.25
*Paper Pups--Clouds at .75 and .90, they are double layered clouds so I did hide/contour for the inside part, then hide/contour for the outside part so I could cut on white, then blue paper.
*Give A Hoot--Tree I think was 5" tall
*Walk in My Garden--All flowers and cut at 1" and the sign, cut at 2"
*Life's A Beach--White Chair and cut at 1.50, the welded word "Relax" was also LAB but the blackout/shadow feature and then I cut the word off the bottom of the chair.

Other Details:
Purple cardstock was DCWV and the Blue for sky was Bazzil, Green for grass was sticker paper I've had fooooorrreever from CM. I used Distress ink pad and ink applicators to shade the robin. The lilac pearls are from Michael's $1 bin and the flower on front was Prima, with another pearl glued down in the middle. I used my ATG and scotch quick dry glue. For the grass, I used a CM tearing tool and tore the green sticker paper's edges.

Can I say that cutting those flowers at 1inch was a bear to put together LOL. My MIL LOVED it and my daughter was so proud of her design work. LOL


August 2, 2010

Well, it is hot, HoT hOT her in OK at 105. So ready for Fall and a cool breeze! Thinking about it got me in the mood to do Halloween cards.

Front
Inside
Ingredients:
5 x 7 premade white card. Used Gypsy, Cricut and WIMG for the sign (3.25), fence (3.25), PDDU for ghost(2.50) tree(4.50) and pumpkin (at 5.5), Doodlecharm for the spider (.90)

Papers--CM Blue with stars, Paper Studio green, Bazzil Golden yellow for moon and browns for fence, tree, sign & pumpkin. Inside card the jack-o-lantern paper is Creative Imaginations.
I cut and glued CM blue start paper down, then used a fiskars zigzag tearing tool to tear the green for the grass. Glued that down. With a black pen, I detailed lines onto the tree & fence. Then used colorbox chalk inks in dk browns and chestnut and beige to do distressing. For the moon, I used MS chalk ink in orange to add some extra color.

Can I tell you how many times I had to cut the blooming ghost
4 TIMES!! Somehow I kept washing my hands because I would somehow get black ink on the ghost. I couldn't figure out where the black ink was coming from. So, I glued one ghost down and it had black ink on it. Rather than pull it off with UNDO, I decided to leave it there and go for a shadow effect and apply another ghost on top with pop dots.

Inside the card: I cut the cute Jack-o-Lantern paper and glued down. Then I distressed the brown sign and glued onto the black sign shadow. Stamped "BOO" with black Stampabilities ink and a rubber stamp. The pumpkin was cut out 3 times--once with all details in orange, next in black and used hide/contour on Gypsy to hide the features. Then in green with hide/contour feature. Orange glued onto the black and then cut the green stem and leaves off and placed on top of pumpkin.


July 20, 2010

Gift Card Holder

So my 9 yr old daughter had an idea for a project. You can tell she's ready for school to start when she says what she's thinking of creating would be a good way to hold gift cards we give her teachers.

Off we go to Michael's and we got a cute painted cup with attached saucer for $2.50 and a $1 wooden picture holder (for 60 cents with the 40% Q). We took the metal picture holder off the wooden part. Then, got some Wilton lollipop sticks, yellow pom poms, florist foam, moss and green florist tape.


INGREDIENTS:
So we used the Gypsy and Cricut and Gypsy Wanderings for the orange, pink and purple flowers. Walk in My Garden for the red and yellow flowers. Flowers were cut in various sizes--2.75, 2.5, 2.25 and 2.0 and layered/glued with Scotch quick dry glue. We cut the lollipop sticks in various lengths and wrapped with the florist tape. Used hot glue to put the yellow pom poms on top of the flowers. The yellow sunflowers and red aster flowers have brown flocking glued into the center of the flowers. We cut and hot glued the foam inside the cup. Hot glued the flowers on top of the sticks and arranged the flowers. Then, glued the sticks into the foam and the moss on top of the foam. Finally, we used florist tape to attach the metal picture holder to a lollipop stick.

Related Posts Plugin for WordPress, Blogger...